This Easter, I decided to combine three of my greatest loves—Jesus, chocolate, and pinhole photography. The result? A fully functional pinhole camera made out of a hollow chocolate Easter egg.
It might sound crazy (and a little messy), but this quirky project turned into something deeply meaningful. As a Christian, Easter is a powerful reminder of Christ’s sacrifice and resurrection. As a chocoholic and pinhole photographer, building a camera I could actually eat after taking the shot was just too fun to pass up.
I had done this a few years previous, but have been desperate to give it another go.
In this post, I’ll take you through the process of making the chocolate egg camera, the image I captured with it, and the story behind why this project matters to me—both creatively and spiritually.
Step 1: Prepping the Chocolate Egg and Adding the Pinhole
The first step was purchasing a Easter egg—not just any chocolate shell, but one big enough to hold some photographic paper and sturdy enough to survive a bit of handling (and melting).
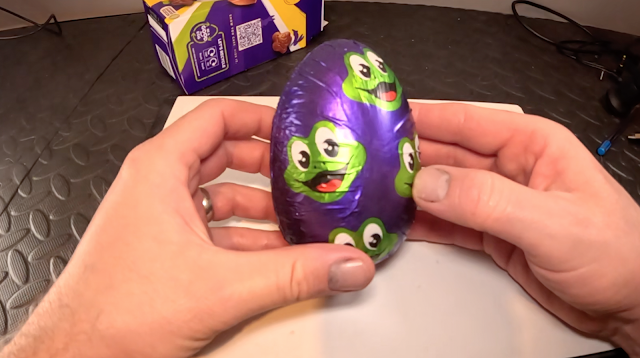
I settle for this Cadburys Freddo egg, mostly because Easter egg prices has shot up and didn't want to spend too much, but was also a good size for 4x5 photographic paper
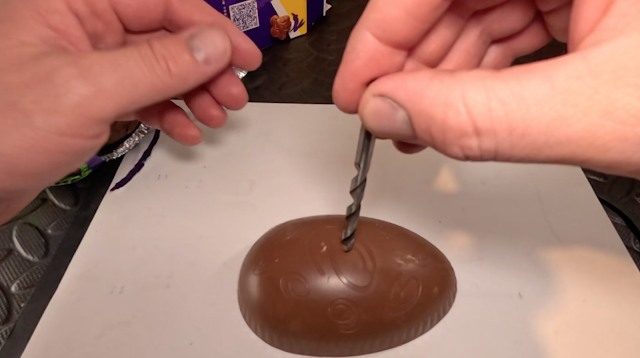
Using a drill bit, I carefully made a hole in one half of the egg, just large enough to fit the pinhole over. For this project, I used a RealitySoSubtle 0.3mm pinhole—a reliable favorite in my pinhole kit.
To attach the pinhole to the chocolate, I used a hot knife to gently melt the surrounding chocolate, pressing the pinhole plate into place while the edges softened. Think of it as chocolate welding—messy, slightly delicate, but very effective. Once it cooled and hardened, the pinhole was securely fused to the egg, and I was ready for the next stage: making it light-tight and loading it up.


Step 2: Cooling Things Down and Loading the Paper
Being a warm day, the chocolate egg didn’t stay solid for long. Between the handling, the heat, and the hot knife work, it was starting to soften—fast. To save the camera (and avoid ending up with a gooey mess), I popped it into the freezer overnight to let everything firm up nicely.
The next day, with the egg camera solid and ready to go, it was time to load the photographic paper. I placed one half of the egg onto a sheet of darkroom paper to mark out the curve and size I needed. After trimming it to fit, I carefully sandwiched the paper between the two halves of the egg.
To hold it all together and keep it light-tight, I used a combination of foil and elastic bands—simple, scrappy, and surprisingly effective. With everything sealed up, I was finally ready for the first test exposure.

Step 3: First Exposure – Sweet... but Not a Success
With a 0.3mm pinhole and a focal length of around 35mm, my chocolate egg camera was operating at approximately f/116—a tiny aperture, typical for pinhole, requiring a longer exposure time.
I set up for my first test exposure, excited to see what kind of image this edible camera could produce. But... it didn’t go well. The photo revealed significant light leaks—patches of unwanted exposure that meant light was sneaking into the camera somewhere it shouldn’t.
First failed exposure
For a moment, I’ll admit—I nearly gave in to temptation and ate the camera right then and there. But I’m not one to give up that easily (especially not on a camera this delicious). So, back into the freezer it went, while I regrouped and started troubleshooting where it was going wrong.
Step 4: Cracks, Foil Fixes, and One Last Shot
The next day, I retrieved the egg from the freezer, determined to give it one more try. Unfortunately, as I began setting up, the back half of the egg cracked. Not ideal—I’d hoped for a complete chocolate shell—but at this point, I had to work with what I had.
So, I improvised. I made a small hole in some sheet foil, then carefully wrapped it around the egg where the photographic paper would sit. This helped stabilize the cracked section and acted as a makeshift light-tight seal. I placed the whole thing inside the original egg box for support and structure.
To finish the setup, I added a shutter made from insulation tape—sticky enough to stay in place, but not so strong that it would rip the pinhole off the chocolate when removed. Knowing this was likely my last chance, I placed the completed camera in the fridge to chill overnight.
The next morning brought cooler weather—perfect for both chocolate and photography. I packed the camera into a film changing bag to avoid any accidental light leaks on the way out.
After a bit of driving around, I found the perfect subject: a cross with Jesus on it. It was exactly the kind of image this project was all about—symbolic, meaningful, and rooted in my faith.

Step 5: Developing… and Dessert
Back home, I mixed up some fresh developer, trying not to get my hopes up after the disappointment of the first attempt. I gently slid the paper into the tray, fully expecting another failed image.
But then—slowly—the image began to appear.
I actually let out a sigh of relief. It had worked. The cross, the light, the subtle tones… it was all there. Imperfect? Of course. But for a camera made of chocolate, it was more than I’d hoped for.
Once it was fixed and safe to view in the light, I finally let myself relax. And with the photo drying on the rack, there was only one thing left to do.
I ate the camera.
Every bite was a victory—sweet, in more ways than one.
Mission accomplished.
Final Thoughts
This little project reminded me that creativity doesn’t always have to be perfect—it just has to be honest. It brought together my love for photography, my faith in Jesus, and yes, my lifelong passion for chocolate, into one messy, meaningful, and surprisingly beautiful experiment.
Easter is about resurrection, new life, and hope—and sometimes that can be captured in even the most unexpected ways. Like through the lens of a chocolate egg.
If you’ve ever thought about trying something wild, weird, or just wonderfully impractical with your art—do it. You never know what kind of joy it might bring… or how good it might taste in the end.
Watch the video on YouTube
Gear Used:
Camera Body: Cadburys Hollow chocolate Easter egg (small size)
Pinhole: RealitySoSubtle 0.3mm pinhole plate
Film/Paper: Ilford MGRC photographic paper (cut to fit)
Tripod: ARTCISE Mini Tripod CS25C with Z plate head
Light Meter: Light Meter app
Shutter: Insulation tape
Developing: ilford pq universal developer
Support
If you like to support my work please check out these link.


-2.jpg)
Comments
Post a Comment