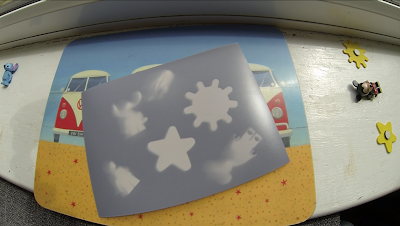
"MAGIC PAPER" fun with the children, watch as the paper changes colour and leaves behind the shadows of what was placed on the paper.
"Magic paper" (as the children call it) or Darkroom paper (Photographic paper which is a paper coated with a light-sensitive chemical formula, used for making photographic prints.)
Like the above says, this is a light sensitive paper, acts like photographic film would, you can put it in a camera take an exposure and then develop it the photo, or more traditional used with making prints from film negatives.
One of the fun things with Darkroom paper is, when its left in direct sunlight for a few seconds it starts to change colour, meaning you can put shapes and things onto the paper and it will leave there shadows still printed onto the paper....for a short time.
Step 1: Choose a paper, loads on the market available, for this I used some Adox MCP 312, Ilford also have a large range available. For things like this, cheap is better.
You do come across it a lot on eBay.
Step 2: If you plan on using any of the paper for photographic proposes you should only ever open the box in a darkroom with a Red light, if you plan on using it for fun with the children, still only open it away from direct sunlight.
Step 3: When you take out you paper, keep away from direct sunlight, a room with curtains drawn is best, lay out all the different shapes on the paper, flatter the better, cover in sand and do sand drawings etc
Step 4: Place in direct sunlight, or as close to as possible, on a window still works perfect.
Depending on how sunny the day is, within just a few seconds you will notice the paper turning dark, 30 seconds and it should be perfect.

Step 5: Remove your stuff, and you have your creation
From this point the paper will continue to darken, you can add more stuff to it as it darkens and it will have a "double exposure" look.
You can add anything and everything to this for all different types of pictures, grass, sting, leaves, sand drawings, hand prints, the list goes on.
TIPS:
- If your doing this with patience children, leave it for a hour or 2 to see how the results change
- Want to keep the image? Have a flat bed scanner ready and scan your creation into your computer, or photographed it with your smartphone, invert the image form negative to positive and play around with the results.
Endless fun for the children to help them discover the basics of photography.
VIDEO OF PROJECT


Comments
Post a Comment